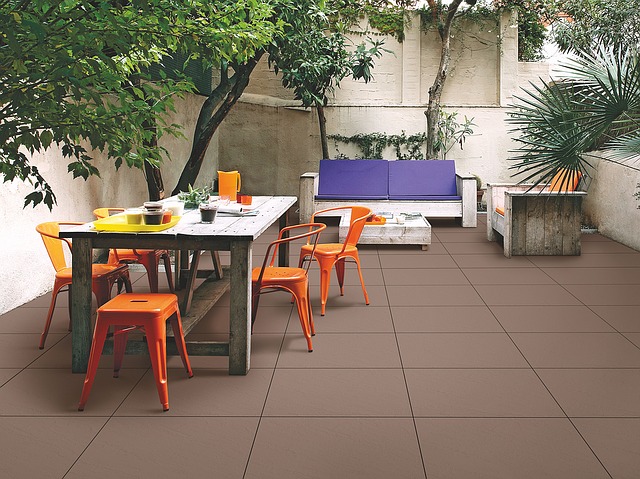
The usage of tiles is ideal for adorning the garden, terrace, or exterior of the house. They are also perfect to use around the pool area and, of course, many other spaces. They add style, color, and design to the space while coordinating with the exterior fixtures. It doesn’t matter how big or small the place is; they can help set the tone, organize an otherwise congested space, and provide visual elements.
Unlike indoor tiles, outdoor tiles are created exclusively for usage outside. Even though they are sturdy and resilient, they will weather with time (as will most materials). They will typically change color due to staining, mold growth, or water exposure due to the external elements. We realize how valuable it is for you to keep your tiles looking stylish and trendy. Aside from frequent cleaning, the key to doing this is tile sealing.
What is Tile Sealing, and Why is it Important for Outdoor Tiles?
Whatever the scenario, it is crucial to consider how you aim to apply to seal to outdoor tiles and which product would be the most effective. Sealing your tile floors will make them more water and dirt-resistant and preserve them from regular wear and tear and stains.
When you seal tiles and grout, it ensures that they become durable, look good, and be easier to maintain. Additionally, it shields your tiles against other outdoor damage that can occur over time due to the weather and simply the passage of time. The porous nature of grout makes it prone to staining; as a result, once the grout has had sufficient time to cure, you should seal it to prevent staining.
Furthermore, choosing an appropriate sealer is critical. When there are a lot of options available, we advise you to consult with an expert to determine which is the best fit for your needs. If you choose the wrong product, it will be rendered ineffective because it will not give your tiles the appropriate level of protection.
What Kind of Tiles Require Sealing?
You should consider sealing all the natural stone items to protect them from stains or damage. The list of natural and artificial porous materials covers everything from marble to slate to limestone to granite to travertine and even concrete. Most porcelain and ceramic tiles do not require sealing but check the manufacturer’s advice before proceeding because there may be some exceptions.
Tile Sealing: A Step-by-Step Guide
If you want to keep liquids and moisture out of your tiles, sealing them is necessary. As we understand that you are concerned about the condition of your tiles, we have included some simple instructions on how to seal your outdoor tiles.
Step 1 – Wipe the Tile Clean
This is merely a simple brushing and sweeping away dust and other undesirable particles that you don’t want to become firmly stuck to your tiles and grout. You can either wipe them down till they are sparkling or clean them until you are content. Brush off any remaining material off the tile’s surface with a broom and dustpan. Before attempting to seal the tile, make sure that the surfaces are entirely free of dust and debris. While doing so, you will be able to maintain the aesthetic of the tile while also ensuring that no dirt or other material is trapped beneath the sealant layer.
Step 2 – Put the Sealant on it
You can use a paintbrush for the application of sealant solution on the tile’s surface. Apply a thin layer of the sealant. Ensure that the coating of sealant fills the whole area of the tile. Additionally, make sure that you evenly distribute it throughout the tile surface. In addition, make sure that the sealer doesn’t drop down onto the grout from the tile’s surface. Let the sealant dry overnight before moving on with the rest of the sealing process. This will help prevent the application of more grout from affecting the color of the tile.
Step 3 – Put on the Grout
Apply the grout by troweling it into the gaps between the tiles after preparing the mixture. Use a float to spread it out evenly between the tiles when applying grout. Remove any visible surplus grout from the tile’s surface. Use a moist sponge to clean the grout after applying for roughly 15 minutes. After approximately an hour, use a damp cloth to wipe away any remaining grout from the surface. Allow for thorough drying of the grout, which takes about two days before proceeding.
Step 4 – Seal the Tile and Grout Again
It doesn’t stop there, either. Brush your tiles once more to remove any dust or dirt that may have settled on them throughout the drying period. After that, you’ll have to seal the tiles once more, including the grout. Use a paintbrush again to apply a thin coat of sealant solution to the tile surface. Make sure that you spread the sealant evenly. Ensure that the entire tile, including the grout, is well coated with the solution. Once again, let the sealant dry overnight.
If you still don’t feel satisfied, you can repeat the final step of this technique as many times as necessary to offer additional protection for your tiles.
The Bottom Line: Good Sealing Makes A Difference!
While tiles enhance the appearance of your home and make it more appealing, it is also your responsibility to return the favor. It’s not uncommon for tiles to develop a variety of defects over time, including discoloration, cracking, and more. You can extend the lifespan of your tiles by sealing them.
Once you’ve completed the entire sealing process, you may take a moment to admire the beauty of your porch or lawn and pat yourself on the back for your hard work. The whole process of sealing your outdoor tiles may take a few days, but it’s well worth it for the many years it will keep them in good condition.